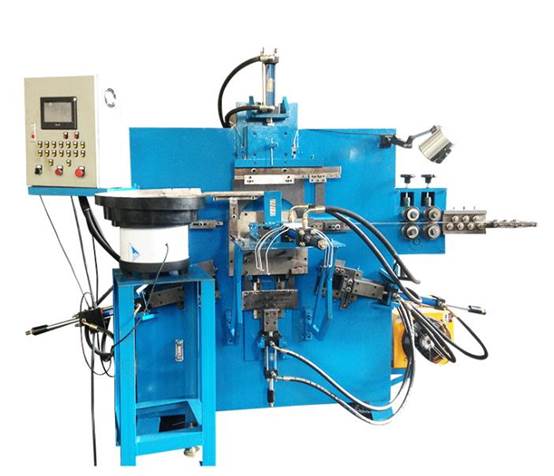
Paint Buckle Handle forming machine

【Instructions】
1. Be sure to inject about three-quarters of the hydraulic oil into the hydraulic oil tank before the machine is working (the hydraulic oil will overflow when the machine is too full).
2. Pour lubricating oil into the oil hole to lubricate all parts.
3. Check whether the screws in various places are loose. If they are loose, they must be tightened.
4. Connect the power supply [black is the neutral wire, the two-color wire is the ground wire, and the other three are the live wire], the voltage is 380V. Press the "Emergency Stop/Power" switch to turn it on. Check whether the mold number installed on the machine is the same as the number on the "parameter number" displayed on the computer, and it must be adjusted to the same, otherwise the mold will be destroyed.
Next, turn the "Reset/Stop/Auto" switch to the left to restore all actions to the original position, and then back to "Stop". This switch has three functions. To the left is "Reset" and to the middle To hit is "stop" and hitting to the right is "automatic".
5. Confirm that the direction of pumping oil in the hydraulic system is turned forward and not reversed.
Sixth, the method of changing the mold and adjusting the mold (inching debugging and forming):
First, select the parameter number to be consistent with the mold number.
Turn on "power"-"start oil pump"-long press "jog feed".
Note: Press and hold, it will stop by itself when it reaches a fixed position, then let go and press the next action. In the process of jog, if the position of some places needs to be adjusted, manually adjust it, adjust it to a suitable position and then jog the next action.
[Mold selection order of jog]:
Turn on the power and start the oil pump
Manual operation:
(1) No. 1 oil cylinder enters——(2) Point fixed length feeding——(3) No. 2 oil cylinder enters—(4) No. 1 oil cylinder retreats—(5) No. 5 oil cylinder enters—(6) No. 3 Cylinder in—(7) No. 6 cylinder—(8) No. 4 cylinder—(9) No. 7 cylinder—(10) No. 3 cylinder—(11) No. 6 cylinder—( 12) No. 4 cylinder back——(13) No. 7 cylinder back—(14) No. 5 cylinder back—(15) No. 2 cylinder back—(16) No. 8 cylinder in—(17) No. 8 cylinder Retreat—— You have completed a product here. If the product is right, you can select "Auto Switch" to automatically produce it.
【Mold Installation】
Find the corresponding mold according to the production requirements, first turn off the power switch, use a screwdriver to loosen the tool fixing screws, put the upper and lower molds into the corresponding holes, and then tighten the mold fixing screws.
【Mold height adjustment】
Loosen the nut with an adjustable wrench, turn the belt pulley by hand to make the upper die down to the lowest position without jamming, and then turn the screw by hand to adjust the height step by step until the height of the mold is checked, and finally lock the nut.
【Precautions】
1. When the machine is running, the operator cannot leave the work post without authorization, and the power switch should be turned off when there is something to leave the post.
2. In the process of operation, if there is any abnormality of the machine or product quality problems, the machine should be shut down immediately, and the relevant personnel should be checked and repaired. It is strictly forbidden to operate in a disease, and it is strictly forbidden to dismantle and adjust the machine privately.
3. When repairing and replacing parts and molds, the power switch must be turned off first, and the replacement and maintenance can be performed only after the machine stops rotating.
4. Electrical equipment must be grounded. It is forbidden to pull or step on the power cord. If the power cord is damaged, it should be reported and replaced in time.
5. After work and after work, cut off the power in time to prevent accidents.